The ESP32 has become the industry-standard microcontroller for Wi-Fi and Bluetooth-enabled IoT development. Its powerful dual-core processor, low-power consumption, and built-in connectivity make it an essential tool for creators and engineers.
While advanced users may prefer Espressif’s ESP-IDF, the fastest and most beginner-friendly way to start programming the ESP32 is still through the Arduino IDE. This tutorial provides a clean, updated guide for integrating the official ESP32 board support package directly into the modern Arduino IDE 2.x, ensuring you use the most current and stable method available.
Prerequisites and Preparation
Before starting the installation, ensure you are running the latest version of the Arduino Integrated Development Environment.
Why Use Arduino IDE 2.x?
The older Arduino IDE 1.x is now outdated. The new Arduino IDE 2.x is built on modern frameworks, offering significantly improved features for ESP32 development:
- Faster Compiler: Decreased sketch compilation and upload times.
- Built-in Debugger: Enhanced troubleshooting capabilities.
- Improved Interface: A more responsive and intuitive user experience.
If you are currently running an older version, we highly recommend downloading and installing the latest IDE from the official Arduino website.
The 3-Step Guide to ESP32 Installation
The official method uses the Boards Manager and requires adding a single URL to your IDE preferences. This process works identically across Windows, macOS, and Linux.
Step 1: Add the Espressif Board Manager URL
You must tell the Arduino IDE where to find the official ESP32 software package provided by Espressif Systems.
-
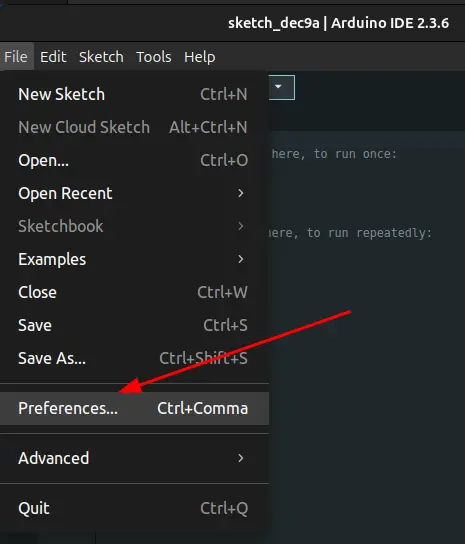
Open your Arduino IDE 2.x application.
-
Navigate to File > Preferences (on macOS, this is Arduino IDE > Settings).
-
Locate the field labeled “Additional Boards Manager URLs.”
-
Paste the following official Espressif URL into the text box:
https://espressif.github.io/arduino-esp32/package_esp32_index.json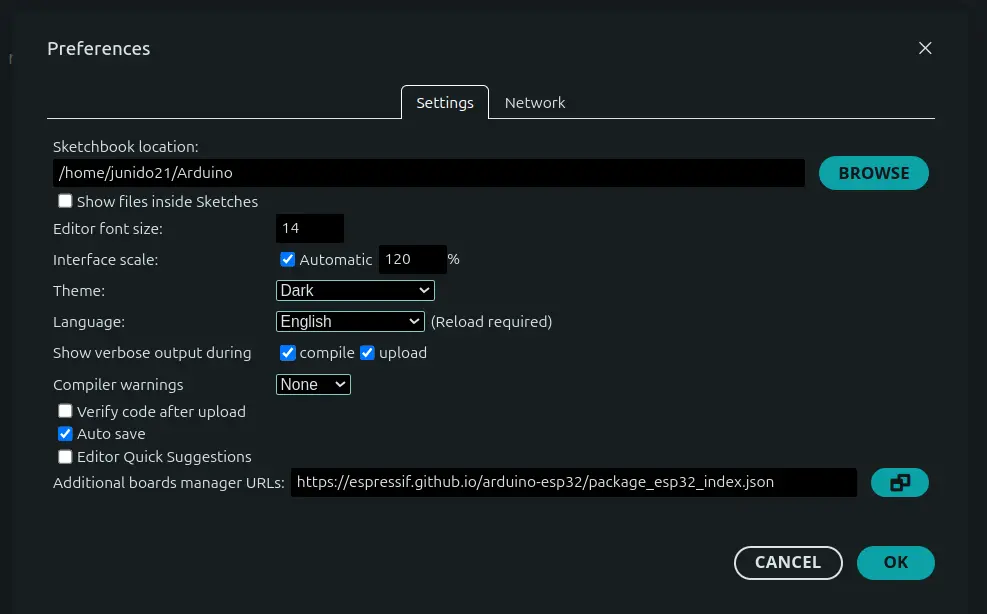
Note: If you already have URLs for other boards (like ESP8266) listed, simply separate the URLs with a comma.
-
Click OK to save the preferences.
Step 2: Install the ESP32 Core
With the URL added, the IDE can now find and install the core files.
- Open the Boards Manager. You can access it in two ways:
- Go to Tools > Board > Boards Manager…
- Click the Boards Manager icon (the icon that looks like a circuit board) in the left sidebar.
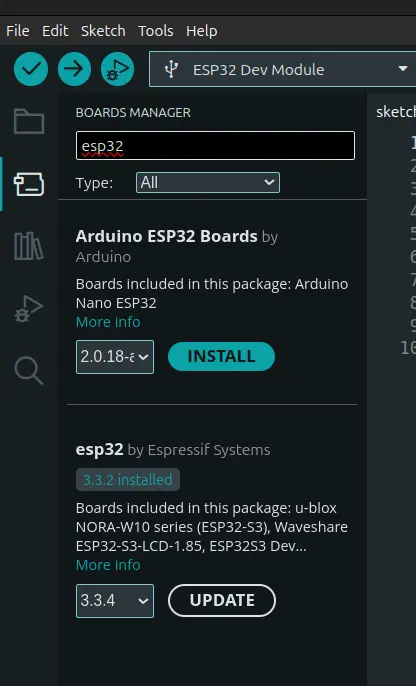
- In the search bar at the top of the Boards Manager window, type
ESP32. - The result labeled
esp32 by Espressif Systemsshould appear. - Click the Install button.
The IDE will now download and install all necessary compiler tools, libraries, and board definitions. This process may take a minute or two, depending on your internet connection.
Step 3: Verify and Select Your Board
Once the installation is complete, you should be ready to compile and upload code.
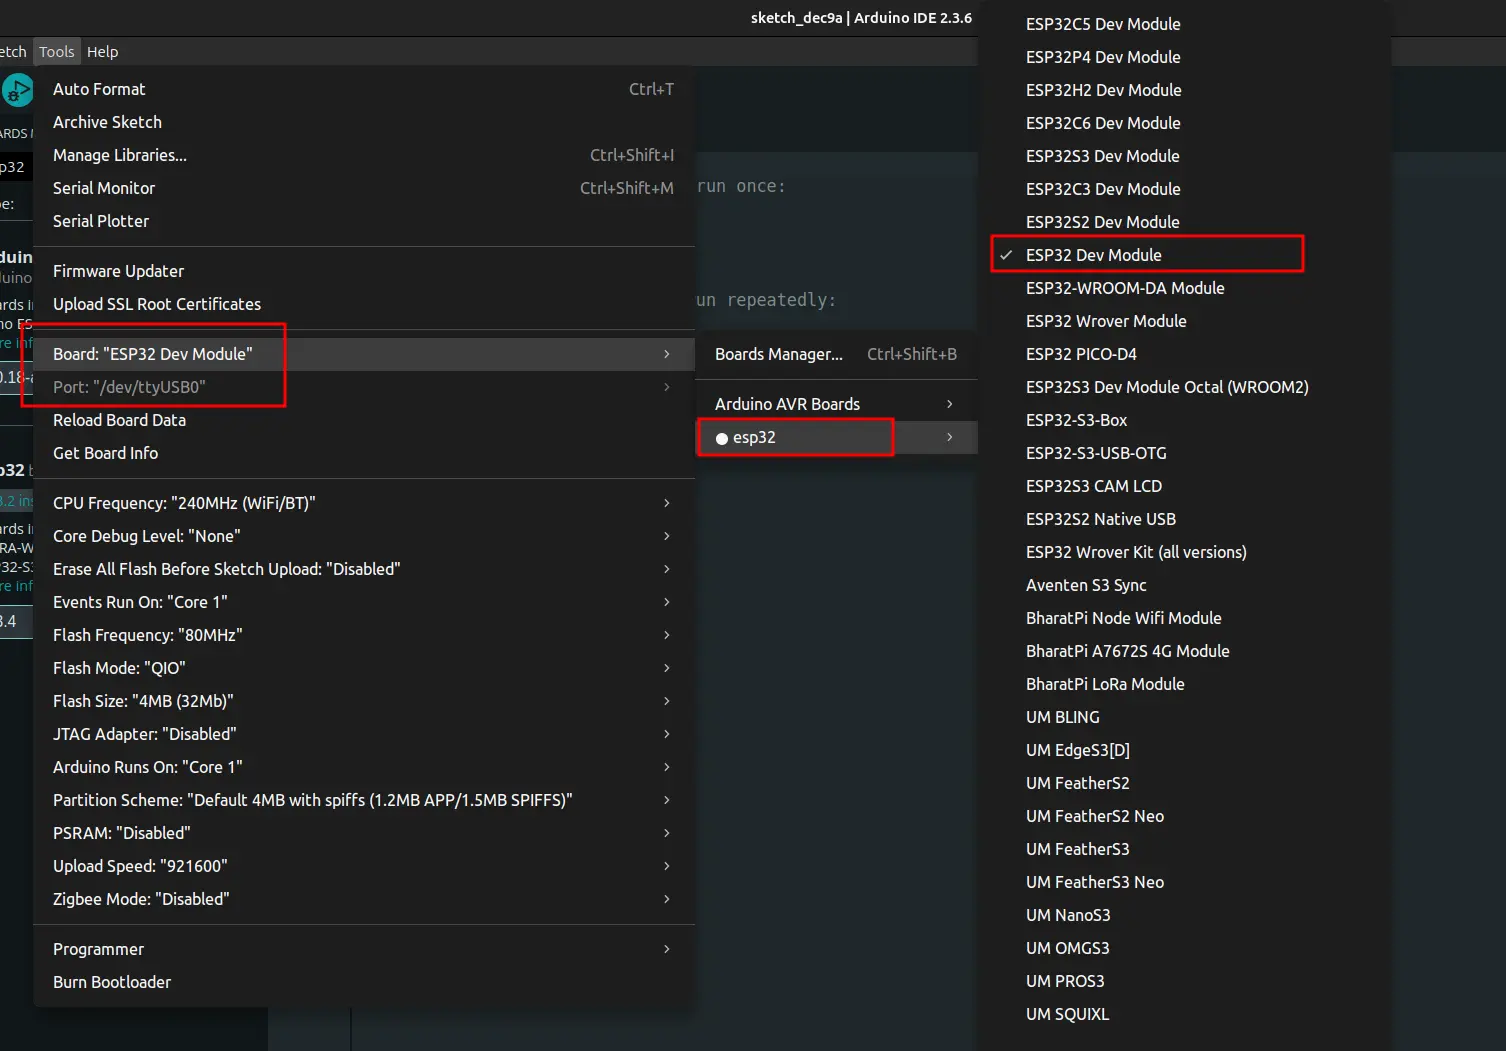
- In the main IDE window, look at the board selection dropdown menu (usually near the top).
- Click the dropdown and search for
ESP32. - Select your specific board model, such as
DOIT ESP32 DEVKIT V1orESP32 Wrover Module.
Testing Your ESP32 Installation
To ensure everything is working correctly, upload a quick test sketch.
- Connect your ESP32 development board to your computer using a quality data USB cable.
- The IDE should automatically detect the corresponding COM port (e.g.,
COM3on Windows or/dev/ttyUSB0on Linux) and display it in the board selection menu. Select the correct port. - Load a basic example sketch: File > Examples > 01.Basics > Blink.
- Click the Upload button (the right-pointing arrow icon).
If the code compiles and you see the Done uploading message, your ESP32 board support is successfully installed and ready for your next innovation!
Conclusion: Start Your IoT Journey
Installing the ESP32 core in the Arduino IDE 2.x is the critical first step to modern IoT development. By following these updated steps, you’ve equipped your environment with the tools to leverage the full power of the Espressif ecosystem. From basic sensor readings to complex web servers and over-the-air updates, your ESP32 is now ready for action.
Ready to start building? Dive into the vast collection of ESP32 tutorials and take your projects to the next level.
Explore the Latest World of Technology.
Android
cross-device
file-explorer
phone-link
photos-tab
tech-news
windows-android
automation
bash-scripting
command-line
cron-jobs
file-permissions
linux-skills
terminal
vim
android-2026
android-security
apk-install
developer-verification
experienced-user
foss
google-play
open-source
sideloading
appimage